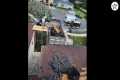
Every roof will experience some sort of localized damage during its lifetime. Individual shingles may get pierced by falling tree limbs, or folded and cracked by the wind. This short video from The Honest Carpenter and BAKER ROOFING will show you how to replace damaged shingles!
BAKER ROOFING is a custom Commercial/Residential roofing and home exteriors company. They provide work of exceptional quality in 20 locations throughout the Southeast!
BAKER ROOFING 517 Mercury Street Raleigh, NC 27603 919-626-8495
Website:
YouTube:
Instagram:
LOCATIONS: North Carolina, South Carolina, Tennessee, Virginia, Florida, Alabama, Georgia
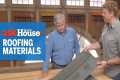
How To REPLACE DAMAGE SHINGLES The Right Way! (VERY DETAILED TUTORIAL... Pro Tips + Tricks)
It’s best to replace individual shingles with shingles from the same manufacturer. This will help ensure that they have the same width after the sun flattens them, and they won’t encroach on their neighbors.
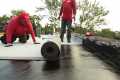
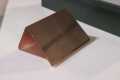
To remove damaged shingles, use a small, relatively thin flat bar with a notch at the end. Shingles adhere to the roofing layers over time, and the flat bar is needed to break their bond without damaging lower or surrounding shingles.
Just work the flat bar carefully beneath the lower edge of the shingle, or start at a corner. When you have a small area lifted, slide the flat bar sideways gingerly to release the full width of the shingle. BE GENTLE!
Because shingles are installed in a staggered grid, you’ll need to loosen and at least partially remove the overlapping upper shingles as well.
Each shingle will typically have upward of 8 nails holding it down—four in the lap at the middle (the “common bond”), and four near the upper edge, known as the “headlap.”
To get these nails loosened, push the flat bar beneath a target shingle at the nail location, and gently pry both the shingle and nail upwards with a shimmying motion.
When they lift together, use the prybar to tap the shingle from above, and the nail will be left standing proud. It can easily be lifted out with the bar now. Do this for all nails holding the shingle in, then pull the shingle out.
Slide the replacement shingle into its place. Drive 4+ nails through the common bond line at locations specified by manufacturer. Then, drive 4+ nails through the shingle above it at the common bond line to nail the headlap. (Replace ANY removed nails.)
It’s best to use 1-1/2” stainless steel ring shank nails for this process.
When Shingles are properly nailed down, “hand tab” them with nickel-sized blobs of Karnak 19 (or some other roofing sealant) placed beneath the lifted shingles. Press the shingles into the roofing sealant. This will help ensure hold down until new shingles can adhere themselves.
That’s how you replace individual damaged asphalt shingles! Thank you BAKER ROOFING for helping to make this video!
The Honest Carpenter
Read More
By: The Honest Carpenter Title: How To REPLACE DAMAGE SHINGLES The Right Way! (VERY DETAILED TUTORIAL... Pro Tips + Tricks) Sourced From: www.youtube.com/watch?v=EB-D_NwJz2I